Sunday 22 December 2019

Mini Calendar Easel Card with sticky note pad

I've finally finished my Christmas projects but I can't seem to stop crafting! So now I've turned my thoughts to the new year by making cute easel cards with mini calendars attached. The easel card design is simple and can be used for lots of different projects but here I use it to keep my sticky notes handy as well as a way for me to check the date!


For this project I used the Sailing Home cling stamps with the matching Smooth Sailing dies. I chose my colours from the Come Sail Away DSP -- Whisper White, Night of Navy and Mossy Meadow. On the first card I used an anchor from the Sail Away Trinkets, attaching it with a bit of the Night Of Navy/Sahara Sand Baker's Twine. My video shows how to use the smallest silver brad from the Metallic Brads to attach the hands to the compass.

The base of the easel is made from a 30.5 x 10.5 cm (12" x 4") piece of cardstock scored at 15.25 cm and 7.6 cm (6" and 3"). Glue a 15.25 x 10.5 cm (6" x 4") piece of coloured cardstock to the bottom half of the front of the card and a 14.25 x 9.5 cm (5-3/4" x 3-3/4") piece to the inside of the card. Glue a 14.25 x 9.5 cm (5-3/4" x 3-3/4") piece of designer series paper to the coloured front mat.

Glue the mini calendar to a piece of coloured cardstock which is slightly larger than the calendar, in my case that was a 7.6 x 5 cm (3" x 2") piece. You should be able to purchase the mini calendars online from a store in your country, however they need to be bought several months before the end of the year. Alternatively, you could print out your own and staple the months together. Glue the mini calendar to the dsp on the front of the card towards the bottom.

Stamp a piece of Whisper White cardstock with images from the Sailing Home stamp set and cut them out using the Smooth Sailing dies or the 3.8cm (1-1/2") Circle Punch depending on the images you stamp. You can also cut out images from coloured cardstock with the dies, such as the hands of the compass, the ship's wheel or the rope.

You can see exactly how to make one of these cards on my video here.

I taught this card at one of my Parent & Child classes recently, but we made it with the Good Morning Magnolia Bundle (Good Morning Magnolia Cling Stamp Set and the Magnolia Memory Dies). Some participants chose to stamp the image while others created a 3-D magnolia using the dies.
This would be a perfect gift for someone or make it for your desk so you have some note paper handy and will always know the date!

#KeepCalmAndCraft #ComputerAndCraftDesigns #StampinUp #creativetherapy #StayHome #PaperCraftIdeas #EaselCard #MiniCalendar #StickyNotes

Monday 2 December 2019

How to Make a Christmas Pop-up Card

Last year I made my first pop-up card by watching several different videos online and I even taught several classes using the Animal Outings and Signs of Santa stamps and Designer Series Paper. I really love how pretty pop-up cards are and how they show off the designs. They are perfect if you have a stamp set that has too many cute images and a flat card just won't do it justice.

This year I had a customer order five pop-up Christmas cards and now that I have a YouTube Channel I decided to make an instructional video to show how they are made. I re-sized the card base to fit in a standard size envelope (A6) and so I could create a card from one piece of paper. In fact, I can get 1-1/2 card bases from one A4 sheet of cardstock, so I can make three cards from two pieces of paper.
Pop-Up Christmas Cards


Most Wonderful Time Product Medley

Several of the cards I made for my customer used retired stamps and DSP, but three are made with current products -- Truck Ride dies, Stitched Stars dies and the Most Wonderful Time Product Medley from the 2019 Holiday catalogue. 

The video shows you how to make the Christmas tree and reindeer card using supplies from the Most Wonderful Time Product Medley along with Old Olive and Whisper White cardstock and Old Olive and Golden Glitz inks.
Most Wonderful Time Christmas Pop-Up Card
I mentioned the sizes in the video and I have a Word Document I created last year with instructions in metric sizes showing the Signs of Santa bundle which is now retired. If you would like a copy of the instructions please give me your email address and I will send it to you. I would love to see the cards you make with my instructions!

#KeepCalmAndCraft #ComputerAndCraftDesigns #StampinUp #creativetherapy #StayHome #PaperCraftIdeas #ChristmasCard #PopUpCard #SoManyStars #SignsofSanta

Saturday 23 November 2019

Swaps Received from November 2019 Auckland OnStage

OnStage was so much fun! I love seeing my fellow demonstrators and all the products which will be coming out in the new year. It's such a great way to get excited about what's to come, especially when I currently have tunnel vision making lots of cards and gifts for orders and upcoming Christmas markets.
Paperartsie Team at Auckland OnStage
Besides getting my hands on the new Occasions and Sale-A-Bration catalogues, I love to get some new products. However I think my favourite thing about attending OnStage is getting to swap papercraft gifts with other demonstrators. It's such an exciting thing to do at the beginning of the event and is a great way to mingle with everyone there.
Freebies from OnStage November 2019
I know I can (and do) go online to get inspiration and ideas from around the world. You just have to look at my Pinterest page for the proof. But I like to get samples which I can refer back to whenever I want, which is why I love swaps! Plus it makes me feel so special knowing that someone made that little gift or card to trade with me! Here are pictures of the swaps I received this year and I have made a video showing them in more detail with the names of those who made each, if there was one included with the swap.
If you'd like more information about any of these please message me and I'll give you the details attached to the swap. Some demonstrators have included instructions or product details with their swaps and others have just included their names so you can look it up at their website.

If you'd like to enjoy the thrill of OnStage then you should join Stampin' Up! You'll get a great discount on your starter kit as well as an ongoing discount on any of your future orders. Contact me or your demonstrator for more information and maybe you'll be swapping with me at next year's OnStage!

Thursday 14 November 2019

Swaps for OnStage Auckland

I love making things with paper and swapping at the Stampin' Up! OnStage event in Auckland is a good excuse for me to get creative. To that end, I made little sewing kit holders to give to my fellow demonstrators on November 16th. I saw the idea online from another demonstrator, Tracy Grant, but I changed the design to turn it into a 'matchbook' fold and sized it to get the most out of the sheets of cardstock I used.


It Starts With Art Bundle
I used the It Starts With Art stamp set with matching dies for these little swaps. This is one of my favourite sets as it has such lovely images which are relevant for most crafters, especially if you are like me and love stamping as much as you love embroidery. The images are so cute -- re-inkers, ribbon, sequins, buttons, pens, clips and thread bobbins -- and they have matching dies so it is easy to quickly put a project together. 

I chose the colours of cardstock and ink to match the four colours of Nature's Twine that I used -- Grapefruit Grove, Mint Macaron, Crumb Cake and Blackberry Bliss. I then sized the matchbooks to fit the little travel sewing kits I had purchased online. Each base piece of cardstock was 5 cm x 14 cm (2" x 5-1/2") and I scored them at 6 cm and 12.7 cm (2-3/8" and 5"). I folded the cardstock in at the score lines and then stapled the smaller bottom piece in place allowing me to tuck the longer top piece into it to make the matchbook.

I embossed a contrasting piece of 4.5 cm x 5 cm (1-3/4" x 2") cardstock with the Button Button Embossing Folder and glued it to the front of the matchbook. I cut long button and ribbon shapes using the Arts & Crafts dies to decorate the bottom front of each little matchbook to cover up the staple.

In order to stamp the thread holders, I first die cut the shapes out of Whisper White thick cardstock and placed them in a template I had made for the Stamparatus. This allowed me to quickly stamp each one accurately, since I was making 80 of them. I then put some Snail Adhesive on the back of each one to hold the ends of the twine in place as I wrapped it around the shape. I used about 46 cm (18") of twine for each thread spool and popped them up on the embossed piece of the holder using Stampin' Dimensionals. I then glued a die cut button on to the twine in a contrasting colour.

Steps to make mini sewing kit holders
I finished them by using a bit of Snail Adhesive to hold a mini sewing kit in place on the inside of each little matchbook.

Here is my YouTube video showing exactly how I made these swaps.

Watch out for my next blog post where I will showcase the talents of my fellow Stampin' Up! demonstrators with pictures of the swaps I receive. I love the ideas I get from swapping at OnStage!

#KeepCalmAndCraft #ComputerAndCraftDesigns #StampinUp #creativetherapy #StayHome #PaperCraftIdeas #HandmadeCard #Swaps #OnStage2019 #AucklandOnStage #SaleABration #MiniSewingKit #Matchbook 

Friday 8 November 2019

Snowman 'Empathy' Card

I came up with an idea to make a card showing a snowman whose head has fallen off. Why has it fallen off ? I don't know. Maybe it was starting to melt. Maybe there was a gust of wind that blew it off. Maybe the snowman was in a snowball fight and got hit in the head. Maybe whoever was making the snowman went away and never finished putting the head on the body. No matter what story you create, it seems a bit sad to see the snowman reaching for it's fallen head. Since this didn't seem to be a Christmas card (even though there is a snowman), I decided to make it into an 'empathy' card.
The inside of the card on the left says "I know this must be hard for you" and the inside of the card on the right says "I just didn't know what to say."

Genuine Gems Cling Stamp Set
The Genuine Gems stamps were perfect for the sentiments because this stamp set has lots of sayings for those times you just can't find the appropriate words. This card would be perfect to give to someone to let them know you are thinking of them during a difficult time in their life.
The base of the card is a standard Whisper White A6 size (5-13/16 x 4-1/8"). I used two Balmy Blue pieces cut to 14.3 x 10 cm (5-5/8 x 4") for the background on the front and a mat on the inside. I cut one piece of Whisper White cardstock to 13.8 x 9.5 cm (5-7/16 x 3-3/4") for the inside of the card. I used two 2 x 10 cm (2-3/4 x 4") thin Whisper White pieces for the snowdrifts on the front of the card. I cut three circles using the smallest Layering Circles dies out of Whisper White cardstock to make the snowman.

SEASONAL LAYERS DIES
Seasonal Layers Dies
I stuck the snowman pieces to the card with Tombow Multipurpose Liquid Glue and Stampin' Dimensionals, tucking parts into the snowdrifts. I cut a scrap of Basic Black cardstock into a hat shape and glued a little strip of Old Olive cardstock on it as a hat band before placing it on the card with dimensionals. I cut a long triangle from a scrap of Pumpkin Pie cardstock and drew little lines on it with a Basic Black Stampin' Write pen to make the carrot nose. The two arms are cut out of Early Espresso cardstock using just the top part of the branch die from the Seasonal Layers die set. All pieces were glued into place using Tombow.

I made a video with instructions -- actually two videos because my phone stopped recording just before I had finished the card. In the first video I show you how to get the snowstorm effect by splattering Snowfall Accents Puff Paint on the Balmy Blue background before heating it with a Heat Tool. I also demonstrate how to tear the thin Whisper White cardstock for the bottom of the card. These pieces are layered to make a snowdrift effect for the snowman to be stuck in. To make the eyes and buttons I used Stampin' Blends to colour Basic Pearls and Rhinestone Jewels. I then had the difficult task of choosing which words to stamp on the front and inside of the card with Memento Tuxedo Black ink. There are so many good choices from the Genuine Gems stamp set!


If you live in New Zealand you can order all the products you need to make this cute snowman card at my shop or from your demonstrator.

#KeepCalmAndCraft #ComputerAndCraftDesigns #StampinUp #creativetherapy #StayHome #PaperCraftIdeas #ChristmasCard #HandmadeCard #SnowmanCard #Empathy 

Sunday 3 November 2019

Want To Melt A Snowman?

I live in a country where Christmas is hot and sunny because it is summertime here in New Zealand in December, however I still love all the traditional festive images of snowflakes, starlit nights, Santa in his red suit and dreaming of a white Christmas. I really like snowmen as they come in lots of different sizes and shapes, which got me thinking of a melting snowman. I remember making one out of felt many years ago so I decided to try to recreate it using paper.

I cut an A4 piece of Whisper White cardstock at 14 cm (5.5") on the long side. I used the 14 x 21 cm (5.5" x 8.25") piece to die cut the Mini Curvy Keepsake Box to make the snowman head.
Mini Curvy Keepsake Box dies
Frosted Foliage stamp set
Christmas Countdown stamp set
I then cut the remaining 15.7 x 21 cm (6.25" x 8.25") piece into a 'melted' blob for the body of the snowman. I stamped all over both pieces with Silvery Shimmer ink using the little star/snowflake stamp from the Christmas Countdown stamp set.
On the remainder of the 14 cm Whisper White cardstock I stamped the words 'You Warm My Heart' from the Frosted Foliage stamp set using Memento Tuxedo Black ink. I then punched it out with the Story Label punch and popped it on to the melted snowman using dimensionals.
SEASONAL LAYERS DIES
Seasonal Layers dies

I cut a scrap of Basic Black cardstock into a hat shape and glued a little strip of Old Olive cardstock on it as a hat band. I attached it to the melted snowman body using black mini dimensionals. I cut a long triangle from a scrap of Pumpkin Pie cardstock and drew little lines on it with a Basic Black Stampin' Write pen to make the carrot nose. The two arms are cut out of Early Espresso cardstock using the branch die from the Seasonal Layers die set.

Before assembling the box I drew a 'melting' mouth on one side with the Basic Black Stampin' Write pen and I used a Basic Black Dark Stampin' Blends pen to colour two Pearl Basic Jewels for the eyes. I then glued all the pieces to the base and used three Red Rhinestone Jewels for the buttons which had fallen off the body as it melted.

Have a look at this video for instructions on how to make one for yourself.


If you live in New Zealand you can order all the products you need to make this adorable snowman at my shop or from your demonstrator. Then you can get started on melting your own snowman!

#KeepCalmAndCraft #ComputerAndCraftDesigns #StampinUp #creativetherapy #StayHome #PaperCraftIdeas #ChristmasCard #HandmadeCard #SnowmanCard #CurvyKeepsake 

Thursday 31 October 2019

Custom Handmade Christmas Cards

I love papercrafts and that is why being an independent Stampin' Up! demonstrator is a perfect fit for me. I really enjoy making cards and other handicrafts and love to show my creations to other people. That is how I got a custom Christmas card order from my daughter's boss. Last year I was showing her a Christmas card I had just made and she asked if I could make 20 of them for her to give to her customers. That was my first custom order!

So this year I created a couple 'sample' cards using the So Many Stars bundle especially for my daughter's boss. I showed her the two cards a few weeks ago and she chose to order the design on the right with the swirls.
I used my computer to print her company's name on whisper white cardstock which I cut to size for the inside of each card. I then went about making 20 of these Christmas cards using balmy blue cardstock, silver foil, silver glimmer paper, silvery shimmer delicata metallic ink for the background stars and silver embossing powder for the sentiment.

I love the Stitched Stars dies because they look beautiful in glimmer paper and the stitching even makes plain paper look more elegant. I used the little stars which cut out of the swirl die as accents on the front of the card as well as one on the back of the envelope, which I stamped in balmy blue ink with the speckled stars from the So Many Stars photopolymer stamp set.
I don't have much family here in New Zealand and the cost of postage to send cards to my relatives in the USA is very expensive so I don't send many Christmas cards, however I am still able to satisfy my desire to make handmade Christmas cards by doing custom orders.

So if you live in New Zealand and would like some handmade cards just let me know. Or better yet, I can teach you how to make your own cards at one of my classes! Just have a look at my website for my contact details and upcoming classes.

#KeepCalmAndCraft #ComputerAndCraftDesigns #StampinUp #creativetherapy #StayHome #PaperCraftIdeas #ChristmasCard #HandmadeCard #SoManyStars 

Tuesday 1 October 2019

World Card Making Day is Coming!

Saturday, October 5th is World Card Making Day and I decided to offer a Free Christmas Card Making Class here in my home. I've been advertising all over Facebook and other internet sites so I am hopeful that there will be a few people coming to make cards. Today I've been busy making lots of Christmas cards as samples for the class.

I will be using the Night Before Christmas Memories & More cards and envelopes in the class because it is very easy to put together a few elements to make a card quickly. However, since I didn't know what the final cards would look like I decided to spread all my supplies out on my dining table.

I grabbed some retired DSP, threads, stamps and embellishments to bling up the cards as well. Even though it looked like a card shop had thrown up all over my table, it was an organised mess!

My original plan was to create four sample cards for the attendees to choose from but once I started combining my supplies together I created 10 cards and I could have kept going! I even got out last year's Poppy Parade coloured cards and envelopes which worked well with some of the images in the Night Before Christmas card pack. I was trying to create simple cards in case those attending were new to papercrafts, but I couldn't help but add embellishments and die cuts.

So I ended up with 5 samples of beginner cards and 5 samples of more complicated cards. I will let those who show up have a choice of which one they would like to make or they can just create their own card from the supplies I will have on the table -- once I clean up my mess! 😅
I could spend days playing with this set by fussy cutting and punching out all sorts of shapes from the cards since the colours coordinate so well and with just a few extra elements I would have 50 Christmas cards. But I didn't want to make things too difficult since I want to get people interested in card making and not scare them away! I will do some more 'messing' about with the cards that are left over after Saturday to make more Christmas cards for my markets and future classes because for me . . . everyday is Card Making Day! 💟


#KeepCalmAndCraft #ComputerAndCraftDesigns #StampinUp #creativetherapy #StayHome #PaperCraftIdeas #ChristmasCard #MemoriesAndMore

Thursday 22 August 2019

Daisy Punch Meets Rooted In Nature Wood Stamp

During a recent class I was teaching, I explained how I punch out images on a sheet of scrap paper so I can easily see which punches I have and how the shapes will fit over a sentiment before stamping it. I hold the 'negative' punched image over the stamp to see if it will fit the shape. This also helps me figure out if the punch will fit a piece of cardstock I want to use, thus saving me time and paper.

While I was demonstrating how to do this I was using a scrap of paper on which I had punched out daisies the night before and I suddenly had an 'aha!' moment. The large daisy fits perfectly over the large wooden ring image from the Rooted in Nature stamp set. So I grabbed one of the ink pads we were using in class and soon I had a textured daisy.

When I was trying to remove the cardstock from the punch, I wondered if I could make more petals by punching out the remaining stamped cardstock. I then had a complete daisy and lots of petals in the same textured colour. I did it again using Cajun Craze ink and began putting my new flower design together. I stuck the two complete daisies on each other and then glued each petal to the centre overlapping the other colour.


Then I went looking for cardstock and DSP to use to make a card with my new flower. That's usually how I create (unless I am CASEing someone else's awesome designs) -- I play around with stamps and dies or punches and then try to use them in a project. I don't always match up colours precisely as I don't think about what coloured cardstock I have before I make the embellishments, plus I'm not thinking of the final design when I'm playing with my stamps and dies. I guess I'm doing things backwards, but it's more fun and challenging that way!

I knew I had a lot of Mint Macaron cardstock so I started with that colour and discovered that the Mosaic Mood Specialty Designer Series Paper used it as well as Cajun Craze, which was one of my flower colours. I then chose Very Vanilla cardstock for the base and central layer because that was in the DSP as well. From there I used my leaf punch and the Painted Harvest stamp set to make two-toned leaves to match the other DSP colours. The Stamparatus allowed me to line up the two-step stamp easily to make the leaves very quickly. I used a 1/2" circle punch to make a Daffodil Delight coloured circle piece which I shaped to fit the centre of my flower. I used Stampin' Write pens in the colours of the flower for the sentiment and pretty soon I was finished with my card.
So now I can't wait to go through all my stamps to see which will fit my daisy punches to create more unique flowers or maybe I can find new textures for my cat and dog punches!


#ComputerAndCraftDesigns #StampinUp #creativetherapy #PaperCraftIdeas #HandmadeCard #CardTechnique

Friday 7 June 2019

Emboss Resist Technique with a Twist!

I have tried the emboss resist technique many times in the past and there are lots of videos online to show how to do it. For those of you who don't know what it is . . . you heat emboss an image using white or clear embossing powder on to white card stock and then rub ink all over the paper so that the image 'resists' the ink. It looks like a magic trick when the image suddenly appears! I remember doing this as a kid with waxed crayons and paint to make 'secret messages' appear on paper.


Recently I tried a little twist to this technique which I have seen a few times online. There is one extra step to achieve this effect. Before embossing I coloured the glossy paper with a few different inks to go with the image I wanted to use. For the leaf card I chose regal autunm colours and for the daisy card I used bright summery colours.

I decided to try two different ways of colouring the glossy card. For the leaves I put a few drops of reinkers (Calypso Coral, So Saffron, and Pear Pizzazz) on the cardstock and then used my heat tool to dry the ink while moving it around the paper. This gave me more colours when the ink mixed on the page which resembled the colour of autumn leaves.

For the daisy card I used sponge daubers to rub three different inks (Lovely Lipstick, Grapefruit Grove, and Pineapple Punch) in various areas on the paper. I started with the darkest colour and them moved up to the lighter colours because I could always add more of the darker colour if I needed. I rubbed the lightest colour (Pineapple Punch) all over the top of the other two to blend any hard lines.

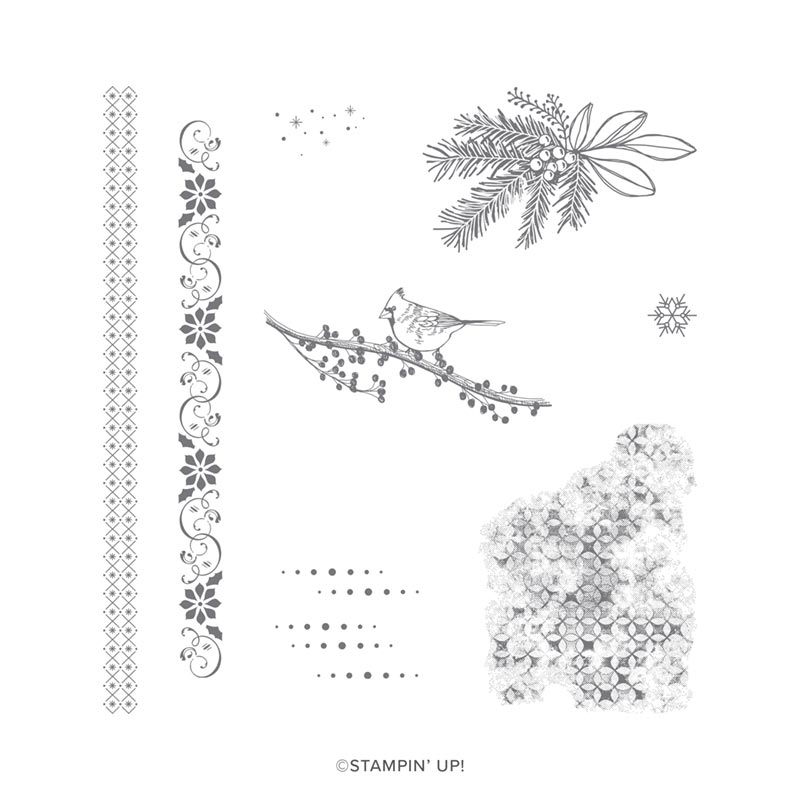
After waiting for the inked pieces of glossy cardstock to dry, I rubbed the cardstock with the Embossing Buddy to prevent any embossing powder from sticking where I didn't want it to go. I then used Versamark ink to stamp my images from the Daisy Lane and Rooted in Nature stamp sets all over the paper before sprinkling clear embossing powder over those images and heat embossing them. This protected the coloured background under the stamped images for my next step.
To make the embossed images more visible, I inked over the entire cardstock with a darker colour. This can be done with a sponge or just pressing the ink pad all over the card stock. After it was all inked up I then took a dry cloth and rubbed the ink off the top of the embossed images just like the traditional emboss resist technique. Then the coloured background showed through the clear embossed images, giving me multi-coloured daisies and leaves!
Once I had finished the emboss resist technique I then had to do something with the pages I had made. This took the longest time as I wasn't happy with the dark green background or the placement of the daisies. I did love how the leaves turned out but I needed to find accessories to create a card for that page.

I then concentrated on the easiest part of the cards, the inside! I stamped a flower on Pineapple Punch cardstock for the inside of the daisy card and then tried to replicate the mixed leaf colours for my autumn card. I used another technique to stamp a different leaf image from the Rooted in Nature set. Using Stampin' Write Markers I coloured different parts of the stamp and then sprayed a little water on it with the Stampin' Spritzer. This made the ink merge and when I stamped the leaf it had a watercolour look to it which matched the embossed leaves on the front of the card.

For my other card, I cut circles out of Grapefruit Grove cardstock to let the daisies show through and I fussy-cut one out of the embossed page to create a bit of dimension. I have since ordered the matching daisy punches so I won't have to fussy-cut daisies again! It's not the best card I've made but I was able to use a lot of images from the Daisy Lane set.

I always learn something new every time I create a papercraft project and this time it was that I should decide on my background colour carefully when doing this technique as you cannot change it once you put the ink down. However I was so excited to try it that I just jumped right in without thinking of what the finished card would be . . . lesson learned!

#ComputerAndCraftDesigns #StampinUp #creativetherapy #PaperCraftIdeas #HandmadeCard #EmbossResist #CardTechnique

Saturday 25 May 2019

Stampin' Spots Come To The Rescue!

I was creating some cards with my Stamparatus for a customer order and the coloured ink pads I needed to use were very 'juicy' which is a common problem with new pads and sometimes due to humidity.

I tried to make the card a few times with light pressure and scraping the ink to one side of the pad, but I still got too much ink on the photopolymer stamp and thus smeared the image. The only other solution I knew of was to scrape off the excess ink or dab the ink pad onto paper which I don't like to do as it wastes the ink.


Then I remembered I had some Stampin' Spots which are perfect for use on the Stamparatus as you don't get ink all over the plates when you ink up your stamps. Fortunately I had some un-inked Stampin' Spots so I dabbed them on top of the 'juicy' parts on my ink pads. This served two purposes -- it removed the excess ink from the pad and created an inked Stampin' Spot which was perfect for use with the Stamparatus.


In the end I was able to create several identical cards quickly and easily, plus I removed some of the excess ink from my full-size pads. This was definitely a win-win!


#ComputerAndCraftDesigns #StampinUp #creativetherapy #PaperCraftIdeas #HandmadeGifts #HandmadeCard