Showing posts with label dsp. Show all posts

Friday, 21 July 2023

Christmas in July -- Let's Go Shopping Advent Calendar!

I recently got my hands on the Let's Go Shopping Collection of products from Stampin' Up! Originally I planned to make an Advent Village with the building images from the Les Shoppes Designer Series Paper, but once I began playing with the stamps and dies I decided to make an Advent Calendar with them. I also used the numbers from the Days To Remember stamp set because they were small enough to fit into each little window.

It was also an excuse to use the hobby blade from the new Take Your Pick Crafter Tips. This blade made it so easy to cut around the windows and then use the small stylus from the original Take Your Pick Tool to score the left side of each window to make them open up, just like an advent calendar.


I cut up pieces of the Les Shoppes Designer Series Paper to put behind each window, creating different floors for my department store -- clothing, books, paints/crafts, ice cream and bakery.

The bottom floor was for the restaurant which has a Christmas tree and presents to be opened on Christmas day!

The dies in this set made it so easy to decorate the building with garland, street lamps, menu board and a potted plant. I used the red Pearlised Enamel Effects Basics lacquer to create berries on the garland and baubles on the tree. I coloured the building with a variety of Stampin' Blends alcohol pens with the main colours of Pecan Pie, Smoky Slate, Misty Moonlight and Pool Party. Of course I had to add some Wink of Stella to the windows to create a reflective glass-look!

I used some retired products to finish off my project -- a die cut wreath, stamped tree and sentiment from the Trees For Sale bundle as well as adhesive-backed snowflakes to make it into a wintery scene.

Here's a short video to show you the details up close.

I hope you like this project and check back soon to see the Advent Village I will make with the Les Shoppes DSP!

#ComputerAndCraftDesigns #StampinUp #CreativeTherapy #KeepStamping #CardMaking #LetsGoShopping #AdventCalendar #LesShoppes #KeepCalmAndCraft 

Thursday, 20 January 2022

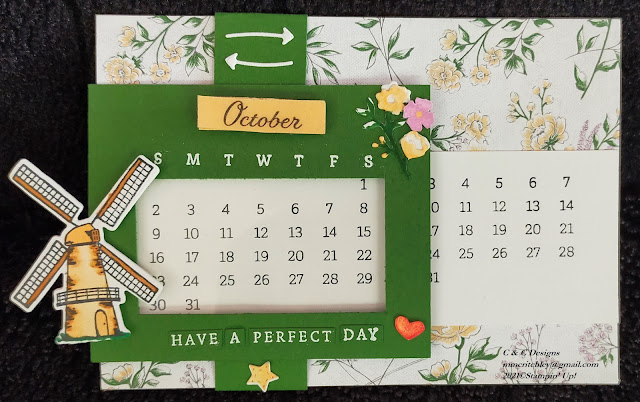
Perpetual Calendar with Interchangeable Images

Ever since I got the Days To Remember photopolymer stamp set from Stampin' Up! I've been wanting to make a perpetual calendar. However I haven't had time to come up with my own idea and then I saw a fabulous sliding card designed by fellow demonstrator, Jessica Lewis. I changed her design to fit the A4 cardstock I was working with and used a different colour scheme and designer series paper (DSP) to make my perpetual calendar.

I used the image and dies from Nature's Harvest for January.

While making the card I had an idea to make it even more fun to use. I added a couple magnets to the left side of the slider so I could change out the image. I then stamped, coloured and cut out a dozen images on basic white cardstock. I put two magnets on the back of each image before covering them with some cardstock so they could be placed on the left of the slider each month.

I also stamped out the extra little images from the Days to Remember stamp set -- flower, star and heart -- cut them out of basic white cardstock and then put a little bit of Tombow Multipurpose Liquid Glue behind each, leaving the glue to dry. This made the glue tacky so the pieces could be repositionable. I put a piece of window sheet behind the opening so that I could put the extra pieces over any numbers not needed for the month I was viewing, like February.

February brings valentine's from the bear in the Count On Me stamp set.

March is my birthday month so I got a balloon from the Hey Birthday Chick stamp set!

I had a lot of fun searching through new and old stamp sets to find pictures I wanted for each month.

April is autumn here in New Zealand so a tree from Beauty of Friendship is perfect this month.

Celebrate Mother's Day in May with a bouquet of flowers from the Blessings of Home stamp set.

June is a chilly winter month here in New Zealand so I used a snow covered tree from the Cabin Dies.

Mid-winter means dreaming of far away places in July with the Sailing Home lighthouse.

August welcomes spring with Flowering Tulips coming through the cold ground.

Celebrate Father's Day in September here in New Zealand with a tie from Handsomely Suited.

October brings thoughts of upcoming summer holidays using the Tulip Fields Bundle.

Count On Me stamps return with a summery kangaroo for the month of November.

A little black kitty from the Sweet Little Stockings set reminds me that Christmas is coming.

Here in New Zealand our seasons and holidays are different than the rest of the world, so I chose a variety of animals, flowers and buildings for my calendar.

I also created a pocket inside with matching Heart & Home DSP so that I can easily store all my images.

I hope you like my card/calendar and if you'd like to make your own have a look at Jessica's video for instructions. Just make the few changes I mentioned above if you'd like yours to have interchangeable images like mine.

#KeepCalmAndCraft #ComputerAndCraftDesigns #StampinUp #CreativeTherapy #KeepStamping #RubberStamping #CardMaking #PerpetualCalendar #FunFoldCard

Monday, 30 August 2021

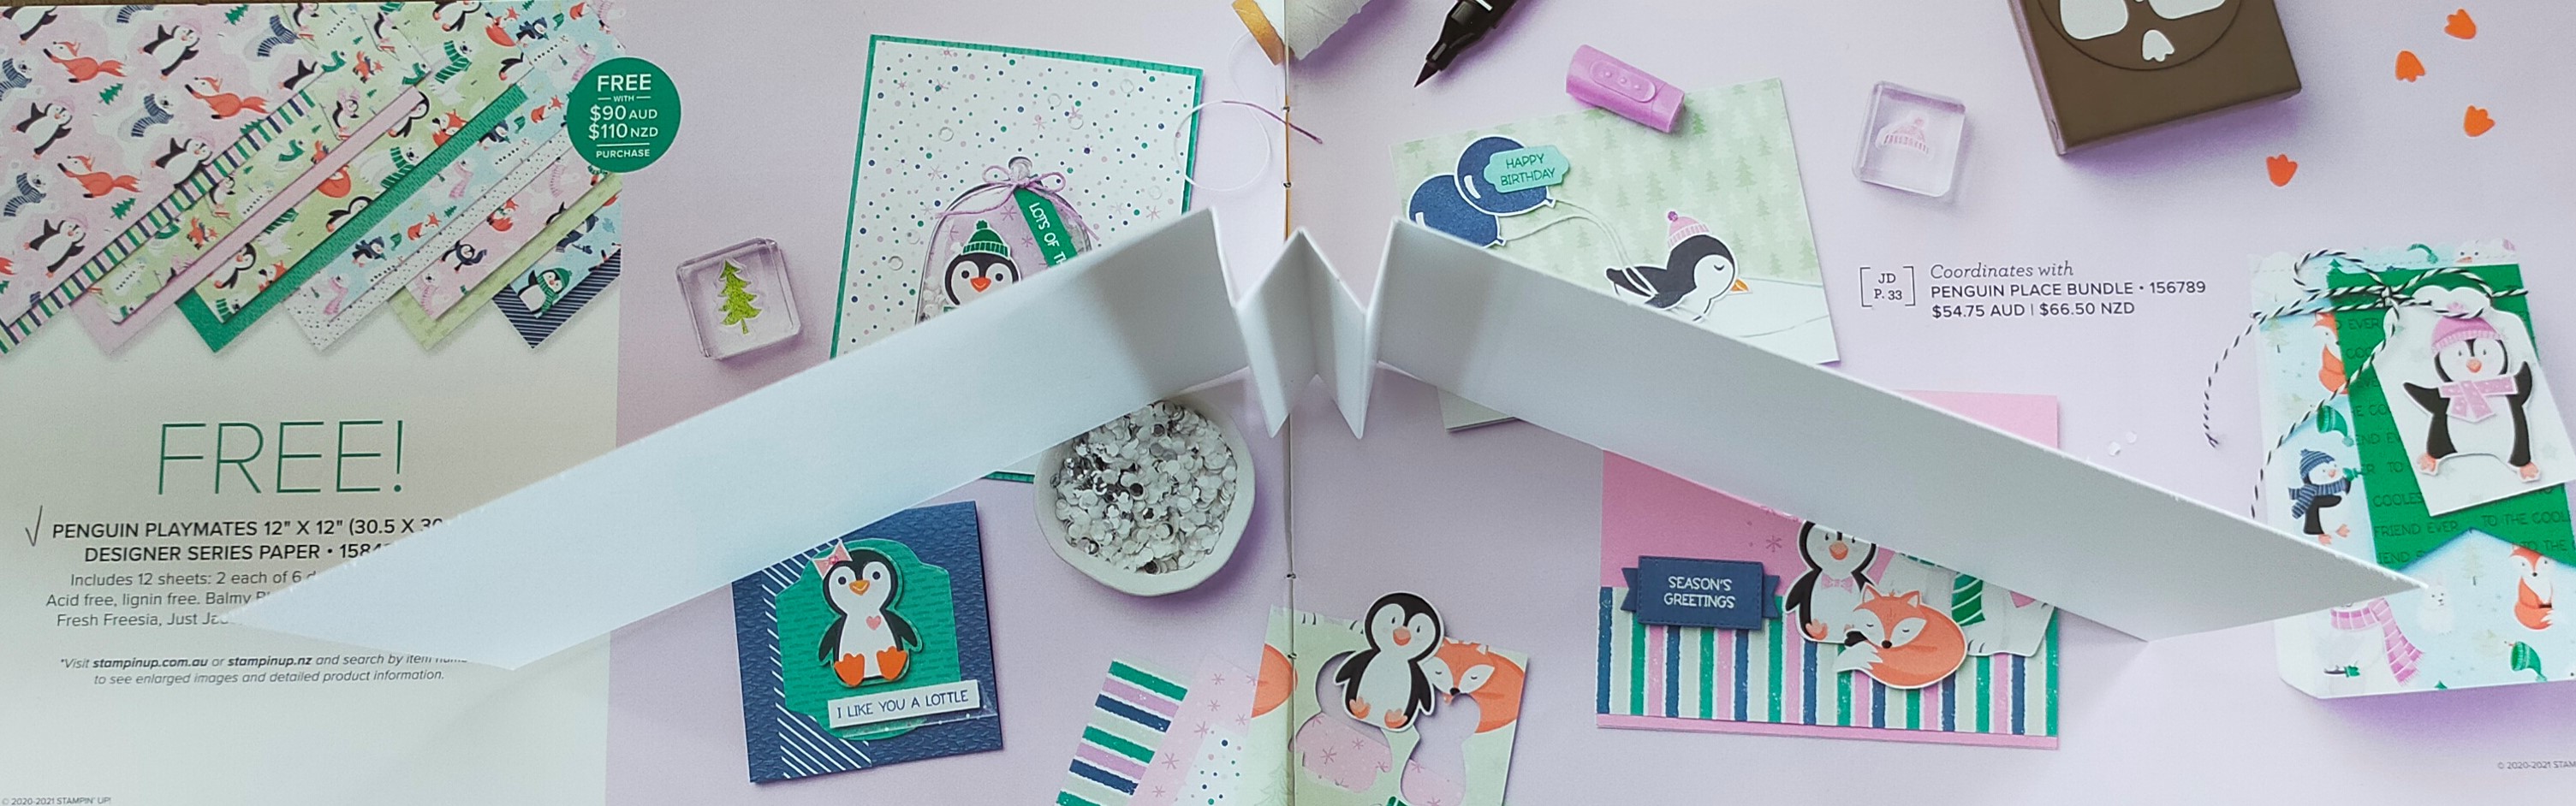
Snow Scene Diorama Booklet using the Penguin Playmates Designer Series Paper

This card came together because I wanted to try my Layering Diorama Dies as well as the alcohol vellum technique. I used my Stampin' Blends pens to colour on a piece of Vellum and then put some drops of isopropyl alcohol on it to make the ink spread to create an interesting background which I die cut and glued to the final page of my booklet.


I created the inside pages of the booklet by cutting a 12" x 12" piece of Basic White card at 4" and scored the 12" side at 5", 5-1/2", 6", 6-1/2", and 7". I then concertina folded the scored sections to create the binding for the inside of my card.

I used four 5" x 4" pieces of Basic White cardstock for the inside pages and a 10-5/8" x 4-1/4" piece of Balmy Blue cardstock scored at 5-1/4" and 5-3/8" for the outside cover. I used the two middle size pieces of the diorama dies to die cut the 5" x 4" pieces of basic white cardstock as well as the front of the 12" basic white and balmy blue pieces so you can look through the entire booklet.


I used the left over pieces from cutting the holes in the white cardstock as masks to create some snowy hills on the card with my Blending Brushes and Balmy Blue Ink


I glued two of the 5" x 4" pieces of die cut basic white cardstock to each inside binding section; sandwiching some of the left over diorama pieces to create little hills in those cutout areas. I then glued the completed basic white inside section to the balmy blue cardstock to create the booklet. I fussy cut several small images from the Penguin Playmates DSP using them to create different scenes on the diorama cutout sections of the booklet with glue and mini dimensionals. 


I stamped snowflakes on the front in balmy blue ink using the Snowflake Wishes stamp set and the 'happy holidays!' words on the final page were from the Frosted Gingerbread stamp set. I finished the card by heat embossing words from the Snowflake Wishes stamp set on a piece of vellum using white embossing powder and fussy cutting around the words before gluing them to the front of the booklet.


This was a really fun booklet to make using a lot of different products and techniques. I love how it turned out and I enjoyed fussy cutting the adorable characters from the Penguin Playmates designer series paper which is only available for a limited time. I can hardly wait to make another one!


Wednesday, 20 May 2020

Best Dressed Mailbag Make

My latest Mailbag Make has been created using the Best Dressed designer series paper with some mini cards and envelopes. The supplies in this kit allow you to make two little 3-1/4" square booklets which you can use as a mini photo album, journal, or special gift.

The front of two booklets and one side of the Best Dressed DSP.
You get six mini cards with envelopes, pre-cut cardstock, and 12 square pieces of Best Dressed double-sided paper so you'll have a huge choice of colours and designs to decorate your books.

The back of two little booklets and the reverse side of the Best Dressed DSP.
You will also get a link to my private instructional video in which I show you how to make the booklets and explain how you can decorate them by fussy cutting some of the designer series paper. If you'd like to stamp your books, as I have done in my sample, you may like to purchase the Dressed To Impress stamp set.


There are enough supplies with this kit so you can make two little booklets with pages made from the mini cards and envelopes.

The first six pages of the booklets made from cards and envelopes and decorated with stamps and fussy cut images.
You can stamp on the pages with your own stamps and ink or attach your favourite photos to them.

The last six pages of the mini booklets decorated with fussy cut images from the designer series paper.
The envelopes pages make small pockets which are perfect for hiding little surprise messages!

The inside of my original booklet with stamped and die cut images as well as some fussy cut paper.
If you don't have any stamps you can write on the pages or just decorate them with images from the designer series paper.


If you want, you could make some mini cards instead of two booklets as you'll have plenty of supplies at hand with this Best Dressed Mailbag Make kit. Just add adhesives and some scissors!


Have a look at my Sneak Peek Video to see what's included in the Mailbag Make and to learn how to order yours!

#KeepCalmAndCraft #ComputerAndCraftDesigns #StampinUp #CreativeTherapy #Scrapbook #DesignerSeriesPaper #MiniBooklet #keepstamping

Saturday, 16 May 2020

Three techniques to make cards from pieces of paper scraps

I must admit that I am a hoarder, but not in a bad way. I only hold on to things that I know I will use in the near future. For example, when I cut my card mats to size there is always a little sliver of paper left over and I keep all those little pieces in a scrap paper drawer so I can use them on future projects.


Sometimes they are useful for stamping sentiments for the fronts of my cards and some pieces are just big enough for a little die cutting. However I end up with lots of straight strips of paper which are great for making backgrounds on cards.


I made a video to show how to use the little strips in three different ways on card fronts.


The first card I created by gluing a variety of coloured strips on to a thin piece of Whisper White cardstock. I used the coloured piece as a background to stamp an image of birds from the Free As a Bird stamp set in Gray Granite ink. I then embellished the front with Mossy Meadow Twine and a sentiment stamped on a scrap of Balmy Blue cardstock.


For the second card I used scrap strips of Come Sail Away designer series paper. I stamped a piece of Sahara Sand cardstock with a sentiment from the Peaceful Moments stamp set in Mossy Meadow ink on a diagonal. I glued the dsp strips on the same angle, leaving a little gap between each piece so the Sahara Sand cardstock could be seen. I then added a little anchor from the Sail Away Trinkets with some Night of Navy/Sahara Sand Baker’s Twine.


I attached this to the front of a Night of Navy card base and use another piece of Sahara Sand cardstock on the inside which I stamped with some images from the Sailing Home stamp set in Night of Navy and Sahara Sand ink.


The final card I made with only two colours -- black and white. I wove the scrap pieces together to make a background mat which I cut with the second largest Stitched Rectangles die. You can learn how to weave paper by watching my video.


I glued the woven die cut piece on to some Real Red cardstock I had put embossed with the Subtle 3D folder. I stamped the field of poppies image from the Painted Poppies stamp set on to a scrap piece of thick Whisper White cardstock using Tuxedo Black Memento ink and coloured them with Real Red Blends. I finished off the front with some Real Red ribbon, rhinestones and words cut with the Well Written dies. This was all attached to a Basic Black card base.


For the inside I used some more images from the Painted Poppies stamp set in Memento Black and Real Red ink on Whisper White cardstock.

I hope my three cards have inspired you to keep those scrap pieces of paper to make your own unique cards!

#KeepCalmAndCraft #ComputerAndCraftDesigns #StampinUp #CreativeTherapy #ScrapPieces #PaperScraps #keepstamping

Saturday, 25 April 2020

Mailbag Make -- Bird Ballad Cards and Birdhouse

My next Mailbag Make focuses on the lovely Bird Ballad Designer Series Paper. This paper is very beautiful with it's many subtle colours and detailed images of birds, feathers and flowers. I discovered three projects online which are perfect to showcase this paper.


My first card is made from a design by Julie Davison which allows the sentiment to take centre stage, surrounded by the beautiful floral side of the DSP with a colourful bird cut from the paper.

Bird Ballad Card using Stitched Nested Labels Dies
My next card I cased from a Dutch demonstrator named Elly Rijnvis and it is the first time I have tried a double easel card.

Front of Double Easel Card
I've made a lot of easel style cards in the past but this is the first time I've tried a double easel one. I really love the way it shows off both sides of the designer series paper!

Double Easel Card
To add a little more dimension to this Mailbag Make I have included a little birdhouse I learned how to make from a video by Silke Trapani, a demonstrator in Germany. Of course it was a perfect match for the designer series paper with a fussy cut bird and some flowers to decorate the front of the birdhouse.

Mini Birdhouse with chocolate eggs inside
Have a look at my sneak peak video of this Bird Ballad Mailbag Make for more details and to find out how to order yours.


I hope you like this Mailbag Make and I'd love to see your completed creations!

#KeepCalmAndCraft #ComputerAndCraftDesigns #StampinUp #creativetherapy #StayHome #MailbagMake #BirdBallad #DoubleEasel #CurvyKeepsake 

Friday, 24 April 2020

One Sheet Wonder cards using Magnolia Lane Designer Series Paper

I joined a challenge with some other Stampin' Up! demonstrators to make One Sheet Wonder (OSW) cards. If you haven't heard of OSW, it is a technique to make a lot of cards from one piece of designer series paper (DSP).

You can find lots of templates online for use with 12" x 12" or 6" x 6" pieces of paper or you could make your own template by cutting up your paper in to lots of different sizes and shapes.
OSW 12" x 12" Cutting Template
Then you just need to use the paper to make as many different cards as you can from the one sheet!
OSW 12" x 12" Card Designs
I chose a sheet of Magnolia Lane DSP for my challenge and found a cutting template online along with a placement design. So I cut my paper into lots of little pieces which were meant to create 14 cards, however I used some of the pieces on the same card (combining #7 with #8 and #9 with #10) so I only ended up with 12 cards.

One Sheet Wonder Cards using Magnolia Lane Designer Series Paper
I used cardstock and inks which matched the Magnolia Lane DSP -- Early Espresso, Mossy Meadow and Petal Pink.

Card designs 1, 2 and 5
I used the Good Morning Magnolia cling stamp set and Magnolia Memory dies along with Stitched Rectangle dies on some of the cards.
Card designs 4, 6 and 11
I coloured some Whisper White Crinkle Ribbon with Stampin' Blends to match the colours I used on a few of the cards.

Card designs 3,12 and 14
I added some embellishments to bling up the cards along with a little Wink of Stella on the die cut flowers.

Card designs 9/10, 7/8 and 13
I also used several different dies and embossing folders to make these cards which I explained in my video.


I got so involved in making the cards that I forgot about following the design template which is why I ended up making 12 cards instead of 14! I hope you like my designs and decide to have a go at making One Sheet Wonder cards for yourself.

#onesheetwonder #KeepCalmAndCraft #ComputerAndCraftDesigns #StampinUp #creativetherapy #StayHome #EaselCard