Showing posts with label stamping. Show all posts

Wednesday, 20 May 2020

Best Dressed Mailbag Make

My latest Mailbag Make has been created using the Best Dressed designer series paper with some mini cards and envelopes. The supplies in this kit allow you to make two little 3-1/4" square booklets which you can use as a mini photo album, journal, or special gift.

The front of two booklets and one side of the Best Dressed DSP.
You get six mini cards with envelopes, pre-cut cardstock, and 12 square pieces of Best Dressed double-sided paper so you'll have a huge choice of colours and designs to decorate your books.

The back of two little booklets and the reverse side of the Best Dressed DSP.
You will also get a link to my private instructional video in which I show you how to make the booklets and explain how you can decorate them by fussy cutting some of the designer series paper. If you'd like to stamp your books, as I have done in my sample, you may like to purchase the Dressed To Impress stamp set.


There are enough supplies with this kit so you can make two little booklets with pages made from the mini cards and envelopes.

The first six pages of the booklets made from cards and envelopes and decorated with stamps and fussy cut images.
You can stamp on the pages with your own stamps and ink or attach your favourite photos to them.

The last six pages of the mini booklets decorated with fussy cut images from the designer series paper.
The envelopes pages make small pockets which are perfect for hiding little surprise messages!

The inside of my original booklet with stamped and die cut images as well as some fussy cut paper.
If you don't have any stamps you can write on the pages or just decorate them with images from the designer series paper.


If you want, you could make some mini cards instead of two booklets as you'll have plenty of supplies at hand with this Best Dressed Mailbag Make kit. Just add adhesives and some scissors!


Have a look at my Sneak Peek Video to see what's included in the Mailbag Make and to learn how to order yours!

#KeepCalmAndCraft #ComputerAndCraftDesigns #StampinUp #CreativeTherapy #Scrapbook #DesignerSeriesPaper #MiniBooklet #keepstamping

Sunday, 1 March 2020

Mailbag Makes -- Craft Anywhere You Want!

I love teaching others how to make things with papercrafts. I have weekly classes in my home and participate in annual events with my upline, called Crafternoon. I have even started making videos to show people all over the world how to make things with Stampin' Up! products.

However I know that some people just can't make it to a class because the timing isn't right or they live too far away. Maybe, like me, they love to watch videos but unless they have the materials at hand they never make the projects they watch. My Pinterest is full of projects I'd love to make, but sometimes it takes too long to prepare the materials. I have the same problem when it comes to cooking -- the prep work takes too long and what I really enjoy is the eating!

So I have come up with a solution to those problems -- papercraft projects already prepared and ready to make mailed out to people which I am calling Mailbag Makes! I will do all the prep work and I will mail you all the pieces needed to make the project. You will get a link to a video of me showing you exactly how to create the featured papercraft. That way you can make the item(s) anytime and anywhere you like as you'll have everything you need ready and waiting for you, except for the stamps and ink.
Each month I will create a different project, ranging from cards to scrapbooks, home decorations, gifts, bags and boxes. The Mailbag Make will include all the cardstock, paper and embellishments you need to make the project. The price of the Mailbag Make will vary each month depending on how many supplies are need and it will not include the featured stamp set or inks, however you can purchase them for an extra fee or just use what you have at hand.
I am starting this offer with an antique-looking Memory Book. You can use this as a scrapbook by attaching your favourite photos to the pages or you could also use it as a diary because it includes 12 printed calendar months. Have a look at my preview video below to see the inside of the book and for more information on what's included.
Just contact me to order your Mailbag Make if you live in New Zealand, unfortunately I am unable to send products outside of my country. Next month I will have another project for sale as a Mailbag Make so check back then or join my email list so you can be notified as soon as the next one is available.

#KeepCalmAndCraft #ComputerAndCraftDesigns #StampinUp #creativetherapy #StayHome #MailbagMake #Scrapbook #DesignerSeriesPaper #MiniBooklet #MemoryBook #CraftHappy #PhotoAlbum

Sunday, 22 December 2019

Mini Calendar Easel Card with sticky note pad

I've finally finished my Christmas projects but I can't seem to stop crafting! So now I've turned my thoughts to the new year by making cute easel cards with mini calendars attached. The easel card design is simple and can be used for lots of different projects but here I use it to keep my sticky notes handy as well as a way for me to check the date!


For this project I used the Sailing Home cling stamps with the matching Smooth Sailing dies. I chose my colours from the Come Sail Away DSP -- Whisper White, Night of Navy and Mossy Meadow. On the first card I used an anchor from the Sail Away Trinkets, attaching it with a bit of the Night Of Navy/Sahara Sand Baker's Twine. My video shows how to use the smallest silver brad from the Metallic Brads to attach the hands to the compass.

The base of the easel is made from a 30.5 x 10.5 cm (12" x 4") piece of cardstock scored at 15.25 cm and 7.6 cm (6" and 3"). Glue a 15.25 x 10.5 cm (6" x 4") piece of coloured cardstock to the bottom half of the front of the card and a 14.25 x 9.5 cm (5-3/4" x 3-3/4") piece to the inside of the card. Glue a 14.25 x 9.5 cm (5-3/4" x 3-3/4") piece of designer series paper to the coloured front mat.

Glue the mini calendar to a piece of coloured cardstock which is slightly larger than the calendar, in my case that was a 7.6 x 5 cm (3" x 2") piece. You should be able to purchase the mini calendars online from a store in your country, however they need to be bought several months before the end of the year. Alternatively, you could print out your own and staple the months together. Glue the mini calendar to the dsp on the front of the card towards the bottom.

Stamp a piece of Whisper White cardstock with images from the Sailing Home stamp set and cut them out using the Smooth Sailing dies or the 3.8cm (1-1/2") Circle Punch depending on the images you stamp. You can also cut out images from coloured cardstock with the dies, such as the hands of the compass, the ship's wheel or the rope.

You can see exactly how to make one of these cards on my video here.

I taught this card at one of my Parent & Child classes recently, but we made it with the Good Morning Magnolia Bundle (Good Morning Magnolia Cling Stamp Set and the Magnolia Memory Dies). Some participants chose to stamp the image while others created a 3-D magnolia using the dies.
This would be a perfect gift for someone or make it for your desk so you have some note paper handy and will always know the date!

#KeepCalmAndCraft #ComputerAndCraftDesigns #StampinUp #creativetherapy #StayHome #PaperCraftIdeas #EaselCard #MiniCalendar #StickyNotes

Saturday, 23 November 2019

Swaps Received from November 2019 Auckland OnStage

OnStage was so much fun! I love seeing my fellow demonstrators and all the products which will be coming out in the new year. It's such a great way to get excited about what's to come, especially when I currently have tunnel vision making lots of cards and gifts for orders and upcoming Christmas markets.
Paperartsie Team at Auckland OnStage
Besides getting my hands on the new Occasions and Sale-A-Bration catalogues, I love to get some new products. However I think my favourite thing about attending OnStage is getting to swap papercraft gifts with other demonstrators. It's such an exciting thing to do at the beginning of the event and is a great way to mingle with everyone there.
Freebies from OnStage November 2019
I know I can (and do) go online to get inspiration and ideas from around the world. You just have to look at my Pinterest page for the proof. But I like to get samples which I can refer back to whenever I want, which is why I love swaps! Plus it makes me feel so special knowing that someone made that little gift or card to trade with me! Here are pictures of the swaps I received this year and I have made a video showing them in more detail with the names of those who made each, if there was one included with the swap.
If you'd like more information about any of these please message me and I'll give you the details attached to the swap. Some demonstrators have included instructions or product details with their swaps and others have just included their names so you can look it up at their website.

If you'd like to enjoy the thrill of OnStage then you should join Stampin' Up! You'll get a great discount on your starter kit as well as an ongoing discount on any of your future orders. Contact me or your demonstrator for more information and maybe you'll be swapping with me at next year's OnStage!

Saturday, 25 May 2019

Stampin' Spots Come To The Rescue!

I was creating some cards with my Stamparatus for a customer order and the coloured ink pads I needed to use were very 'juicy' which is a common problem with new pads and sometimes due to humidity.

I tried to make the card a few times with light pressure and scraping the ink to one side of the pad, but I still got too much ink on the photopolymer stamp and thus smeared the image. The only other solution I knew of was to scrape off the excess ink or dab the ink pad onto paper which I don't like to do as it wastes the ink.


Then I remembered I had some Stampin' Spots which are perfect for use on the Stamparatus as you don't get ink all over the plates when you ink up your stamps. Fortunately I had some un-inked Stampin' Spots so I dabbed them on top of the 'juicy' parts on my ink pads. This served two purposes -- it removed the excess ink from the pad and created an inked Stampin' Spot which was perfect for use with the Stamparatus.


In the end I was able to create several identical cards quickly and easily, plus I removed some of the excess ink from my full-size pads. This was definitely a win-win!


#ComputerAndCraftDesigns #StampinUp #creativetherapy #PaperCraftIdeas #HandmadeGifts #HandmadeCard

Sunday, 5 May 2019

Quick and Easy Crafting with Kits


Sometimes I lose my crafting mojo and even though I can find lots of beautiful things to create online, when I sit down at my table I feel overwhelmed. That is when a kit comes to the rescue!

Much like going to a class, a kit provides you with everything you need to make several projects. The only thing missing is the teacher and classmates, but sometimes I just want to be alone and do my crafting in the comfort of my pajamas. I certainly can't do that at a class! 😉

When I became an independent Stampin' Up! demonstrator over 2 years ago I bought a couple kits from the current catalogue. I followed the instructions and made all the cards exactly as shown in the pictures. This quickly gave me a large quantity of cards to offer for sale at the craft markets I started attending and I didn't have to invest a lot of money in full products to make things.

Cards from 2017-18 All-Inclusive Kits
Now that I am a 'seasoned' demonstrator I still use kits for a variety of reasons. Even though Stampin' Up! offers a multitude of coordinating products and has a beautiful catalogue with hundreds of fabulous project ideas sometimes I just need something quick and easy to do. That is why the kits come in different styles, depending on what the crafter wants and needs -- all-inclusive kits, project kits and limited-time kits.

Different kits from the 2018-19 catalogues
I love kits because of the versatility of the products they have which allows me to make cards quickly or I use the items to create other projects. Using a kit is a great way to try different things without having to purchase a full set of products. With a kit you can use different embellishments, such as twine, vellum, glitter paper, foil paper, pearls, ribbons, dsp and dimensionals. Some kits also have different shapes and sizes of cards and envelopes as well as different cardstock colours. The other great thing is you get to play with cutout shapes without having a die cutting machine or a punch.

Another wonderful benefit of using kits is you get exclusive products which usually cannot be purchased separately. Each kit comes with an ink spot, cards, envelopes and embellishments created just for that kit. So purchasing several kits with different ink colours will allow you to collect a supply of ink without having to invest in the full-size ink pads. I personally prefer using ink spots with the Stamparatus as it creates less mess on the plates. The spots are also easier to travel with.

The 'All-Inclusive' kits come with everything you need to make the cards -- stamps, ink, cards, envelopes, embellishments and dimensionals. These kits are great for 'on the go' crafting as you have everything you need except for scissors, Tombow multipurpose liquid glue or Tear & Tape adhesive. The supplies usually come in a sturdy box for easy storage or you can use the box as gift packaging when you complete your kit. The kits usually come with matching envelopes so you are ready to post the cards once you are done. When you complete an 'all-inclusive' kit you then have stamps and an ink spot to use for other projects which is why these kits cost a bit more than other kits.

Made To Bloom all-inclusive card kit #148537 $57 NZD
Lots of Happy all-inclusive card kit #146388 $74 NZD
Soft Sayings all-inclusive card kit #145466 $74 NZD
The 'Project' kits do not come with stamps as the stamp set is sold separately. So you can use any stamp set you have to complete the cards in this type of kit or you can purchase the recommended stamp set to make them as shown in the instructions. The benefit of having the stamp set separate from the kit is that you can purchase more than one kit if you wish to make a lot of cards and you won't end up with duplicate stamps. Sometimes these kits include an exclusive item, such as the clear storage box in the 'Incredible Like You' project kit. You will need to use your own scissors, adhesive, inks and stamps to complete the cards in a project kit, however that is reflected in the lower price.

Incredible Like You project kit #148552 $57 NZD
Matching Incredible Like You stamp set #148708 $36 NZD
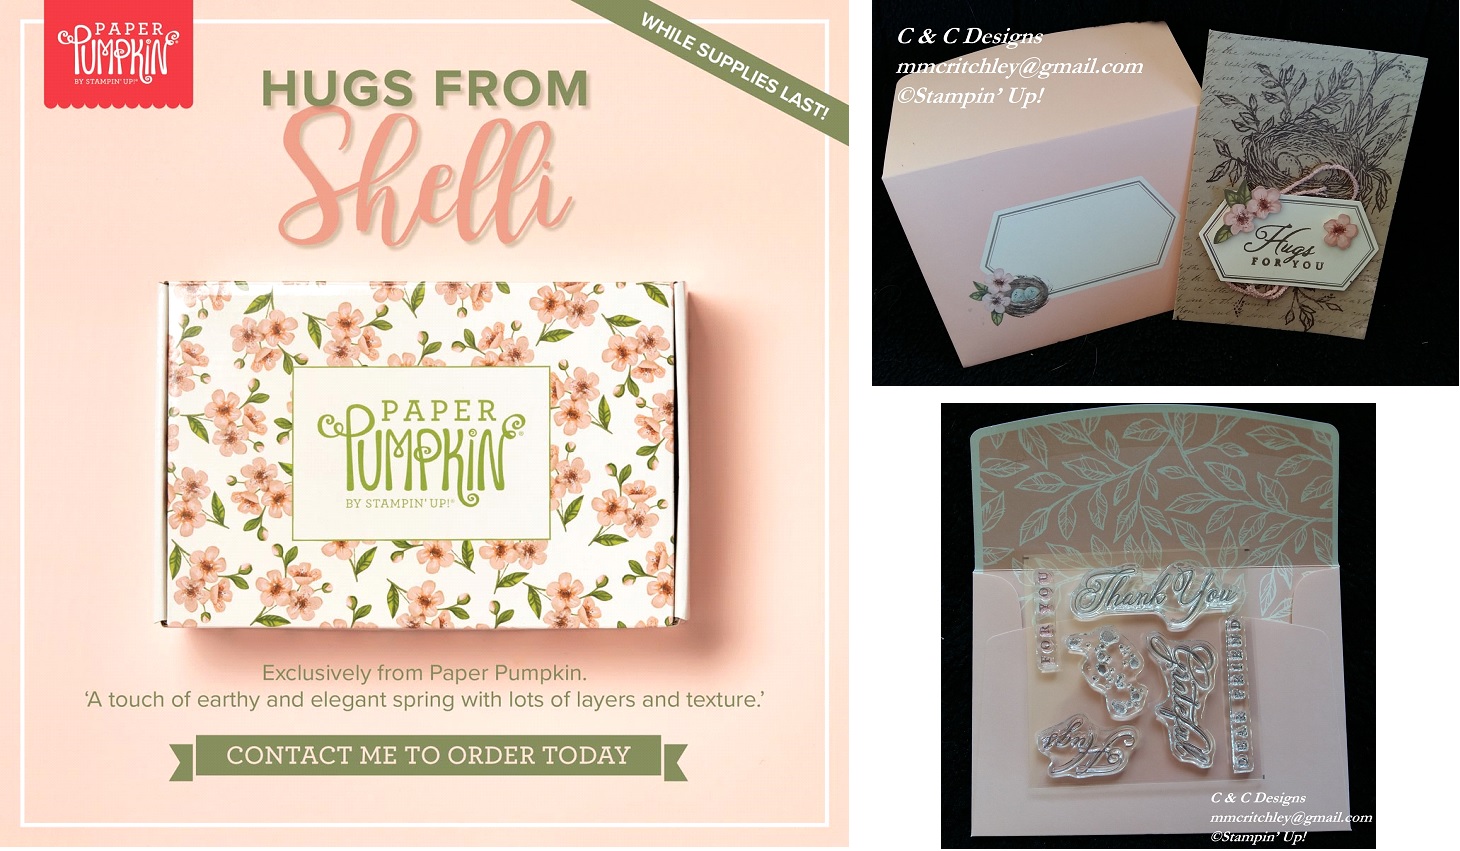
Occasionally Stampin' Up! comes out with limited-time offers and on May 15th there will be an exclusive kit offered here in New Zealand. In the USA and Canada, crafters can subscribe to a stamping kit from Paper Pumpkin which has exclusive Stampin' Up! products in it each month. However for one time only, we will be able to get a kit from Paper Pumpkin which is called the 'Hugs From Shelli' kit and it will include an exclusive stamp set not available anywhere else, one Classic Stampin’ Spot®, paper and crafting materials to create 12 cards (3 cards of 4 unique designs), 12 coordinating envelopes, adhesives and embellishments for all 12 cards in a decorated storage box.

This kit was created with the help of Shelli Gardner, co-founder of Stampin' Up! It will only cost $44 NZD and is available for a limited time, so if you'd like one of these kits please let me know asap as when they sell out they will be gone forever. The Paper Pumpkin kits are always a surprise so I can't show you what will be in it as I don't know, however I was lucky enough to get to make one of the exclusive cards when I attended OnStage last month and I even got to keep the photopolymer stamps!


Hugs from Shelli Paper Pumpkin kit #152032 $44 NZD
When I am pressed for time, I sometimes use a kit for one of my classes so I don't have to prep all the different elements for the cards. Kits are also wonderful if you need a lot of a similar cards made quickly, such as birthday or thank you cards. Sometimes just making a few cards from a kit can get my mojo going so I can then get back into my creative groove!

#ComputerAndCraftDesigns #StampinUp #creativetherapy #PaperCraftIdeas #HandmadeGifts #HandmadeCard #PapercraftKit

Saturday, 27 April 2019

Stamping Outside the Paper!

I know the title of my blog is Papercraft Addiction, but sometimes I need to do crafting without paper. Crazy thought, I know! However I did used ink and stamps, so it's still a hand-craft.

I watched a video online and then attended my upline's technique class to learn how to stamp on to a ceramic mug. The main things you need to know to do this technique are that you use StazOn ink and bake the mug at 180 degrees Celsius for at least 20 minutes to make the ink stick to the mug. You can then colour the image with Stampin' Blends and re-bake it to fix the ink to the mug. However I am not sure the image would stay on if you wash the mug in a dishwasher, but I don't have one so I can't test that theory.

At the class I attended I was able to get a good image after only a couple tries and then I was asked to help other students as I seemed to have mastered the technique. I was so impressed with how easy it seemed that I went out and bought 10 mugs so I could make some to sell at my monthly craft markets.

Well, I don't know what happened from when I learned the technique to the day I tried to stamp my own mugs because it seemed so simple before, but when I was doing it at my own home I kept having problems. Fortunately I could wipe off the ink before it dried and try, try, try, try again!

I think my first problem was that I attempted to put too many images on the mug in one go. The mug kept slipping and smearing the images. I then decided to only use a couple of stamps and eventually I got an image that I was happy with. I thought I had finally figured out the correct pressure, angle, and speed, but no! I continued to wipe off more ink than I kept on the mugs.

I would say this technique is best for patient people or stubborn ones like me, as I was determined to get all 10 mugs stamped! My frustrations were increasing as I couldn't understand why it had been so easy the first time I did it only the week before.

I learned a lot from my mistakes though, like the images don't go on straight because the mug is curved. That is why most of my sentiments are at quirky angles, but I think it looks like it was meant to be that way. At least that's my story and I'm sticking with it!

Finally with multiple adjustments in stamp placement . . . trying it while standing . . . trying it while sitting . . . rolling the mug from the left . . . from the right . . . and even backwards . . . I was finally able to get all 10 mugs stamped and baked.

The next step was to colour them. Although after having so much trouble stamping the images I was afraid of messing them up, but I persevered. I used the Stampin' Blends to colour each mug. I started with the easy one -- the panda holding a balloon. Then I coloured the daffodils and discovered that even though the mugs had been 'heat set' in the oven the Blends would smear the black ink if I rubbed too hard or too long in one spot.

After a bit of a learning curve, I finally got the hang of how to colour each mug without ruining the image. I even found out that the Color Lifter works like an eraser to remove the ink, even the black ink which had already been baked on. It was really handy in fixing some of the smeared images. And if I didn't like the colour/shade I used I could go over it with a different colour and the previous ink would come off.

So here are the final, coloured mugs which I hope to sell at my markets. I am a bit worried that the images will come off when the mugs are washed so I think I will add a note to them saying they should be gently hand-washed.
Since I didn't use paper maybe I should change the name of my blog to Stamping Addiction or Try Try Again Crafting or Trying Crafter or just Stubborn Crafter Who Won't Give Up! What do you think?

#ComputerAndCraftDesigns #StampinUp #creativetherapy #PaperCraftIdeas #HandmadeGifts

Saturday, 20 April 2019

Lots of inspiration through swapping

One of my favourite things to do when I attend an OnStage event is to swap 3-D papercrafts and cards with fellow demonstrators. Not everyone attending the event participates in swapping, but I find this is a great way to see what other people create as well as get a collection of projects to inspire me. Sometimes I am so impressed with a swap I receive which uses products I don't own that I end up buying them. As if I need an excuse to get more craft supplies! 😁

In an earlier post I showed the swaps I had made for OnStage Live in Auckland. I also made some gifts to give to new friends and ended up using some of those as swaps as well. I was pleasantly surprised at how many people were swapping and I quickly ran out of the 100 I had brought.

I love seeing how talented Stampin' Up! demonstrators are and want to share everyone's creations with you, so here are pictures of the more than 100 swaps I was given at OnStage April 2019. Most of these are simply card fronts however a few are complete cards and treat holders.
The inside of some of my swaps.
I can hardly wait to make swaps for the next OnStage event in November, but for now I'll just have keep looking at all of these beauties . . . and maybe even CASE a few of them!


Wednesday, 17 April 2019

OnStage Live in Auckland!


Last week I attended Stampin' Up!'s OnStage Live event at the Sky City Convention Centre in Auckland. This was the first 'live' OnStage that I was able to attend since becoming an independent demonstrator two years ago. I have been to four one-day OnStage events in Auckland previously which were wonderful, however this three-day live event was beyond fabulous! I had so much fun seeing all the products, making new friends, watching the various presentations, playing with new stamp sets, and receiving lots of swaps and gifts.

I even got to meet Sara Douglass (CEO) and her mother Shelli Gardner (co-founder) who were so funny and inspiring with their talks and stamping presentations. They worked really well together and showed that everyone makes mistakes when stamping, which just proves that our crafts are hand made!

I felt so motivated from the moment I arrived at the event. I got to share the experience with my one of my downline, Caz, and lots of ladies from my upline since we all stayed in rooms in an apartment near Sky City. It was also exciting to meet so many like-minded people who had traveled far and wide to come together and share their passion. I had lots of fun at registration swapping and chatting with demonstrators (about 600) from all over New Zealand and other countries.

I will be creating another blog post soon showing the hundreds of beautiful swaps I received, once I have a chance to sift through them all. As soon as I got home from Auckland I had to get back into the 'working world' so I haven't had time to look at all of my swaps.


I can't wait for the new catalogue to begin on June 4th, however there are a few other goodies being released sooner to whet the appetite. There is going to be a special Paper Pumpkin kit which Shelli Gardner helped create and is called Hugs from Shelli. It will only be available while stocks last and goes on sale on May 15th. This kit is perfect for beginning crafters as you get everything you need (except a clear block) to create 12 cards in four different designs. Have a look at this video for a sneak peak and contact me if you'd like to get you hands on one!

There is also a special product medley kit which will only be offered in the month of May while stocks last. It is called Everything Is Rosy and you can see the items included in the kit in this video. This is a non-traditional kit because it includes lots of products which you can use to create a medley of different items however there are no specific instructions. This is great for casual or avid crafters because there aren't instructions so you can create whatever you want and are only limited by your imagination or by Pinterest and YouTube! 😉

There were lots of other great presentations and emotional talks over the three days. They were all very inspiring and have given me a lot of great ideas for my business. I was even chosen to go on the stage to play a game with fellow demonstrators. We were each given a sign to use as our 'buzzer' when answering questions. My sign said 'Booya!' which I shouted out many times as I am very competitive. I managed to win a stamp set for my team of three participants by answering the most questions' however my enthusiasm was noticed by all and from that pointed on I had the nickname of Booya. At least I won't be easily forgotten! 😆

I am now a bit sad that OnStage is over but I was having way too much fun and needed to get back to reality, although I was able to bring some of the fun home in the form of free gifts and prizes! I have so many new things to play with that I think I will be able survive until the new catalogue is released in June. I now feel even more motivated to Share What I Love! 💖

#ComputerAndCraftDesigns #StampinUp #creativetherapy #PaperCraftIdeas #HandmadeCard #Swaps #OnStage #AucklandOnStage