Find ideas, instructions and materials used to make a variety of paper-craft projects using Stampin' Up! products. As an independent Stampin' Up! demonstrator in New Zealand I love to share my passion for creating things with paper including cards, boxes, gifts and decorations. I find that making things is a fun and relaxing past-time which relieves stress and gives me a purpose to be active every day. If you have any questions or want to learn more about Stampin' Up! feel free to contact me.
When I was a Brownie Leader, about 15 years ago, I used to print the Brownie promise, song and Girl Guiding rules onto a piece of paper and then with a bit of folding and one little cut I turned it into a mini booklet for the girls. I decided to revisit this idea and create mini booklets with Stampin' Up! products.
I started with an A4 sheet of Whisper White cardstock and scored it in the middle at 10.5 cm (4-1/8") and turned the page 90° to scored it again at 7.425 cm (2-7/8"), 14.85 cm (5-7/8") and 22.275 cm (8-3/4"). I folded it down the middle both ways and then folded each narrow end in towards the middle. I cut the centre scoreline (10.5 cm line) down to the outer fold lines. I then folded the paper on the 10.5 cm middle fold and holding each end, pushed the sides in to create a little booklet.
Sample of cutting and folding using a piece of printer paper
I used a piece of printer paper as a sample to create my design placement. If you are going to stamp on each section you need to do it while the cardstock is flat, before you put the booklet together. Other embellishments can be added when the booklet is folded up.
For my first booklet I used the Beautiful You Cling-Mount Stamps, the Under My Umbrella Photopolymer Stamps and the Umbrella Builder Punch.
Pages 1 and 2 of Umbrella booklet
The designer series paper I used was only available during Sale-A-Bration and the designs matched the Umbrella Builder Punch. I fussy cut the stamped flower images after colouring them with Stampin' Blends.
Pages 3 and 4 of Umbrella booklet
I used a bit of Balmy Blue cardstock and coloured in the stamped images with Tuxedo Black Memento Ink before colouring them in with Stampin' Blends using colours from the umbrella designer series paper.
Pages 5 and 6 of Umbrella booklet
On page five I sponged a bit of Daffodil Delight ink in a circle to create a little sun peeking out of the Balmy Blue cardstock which was die cut using the Stitched So Sweetly Dies.
In my video I show you how to make a mini booklet using Painted Poppies Cling Stamps, Peaceful Moments Cling Stamps, Painted Labels Dies, and Poppy Moments Dies.
Pages 1 and 2 of Poppy booklet
I stamped the images using Tuxedo Black Memento Ink and decorated them with Poppy Parade and Old Olive colours.
Pages 3 and 4 of Poppy booklet
For the die cut flower I used Rich Razzleberry ink, stamping several times to get subtle colour changes in order to match the designer series paper peeking out of the floral die cut from the Poppy Moments Dies.
Pages 5 and 6 of Poppy booklet
I used one of the Peaceful Poppies Elements along with some die cut images from the Painted Labels Dies to decorate the final two pages. To get the black ribbon I coloured a length of Whisper White 1/4" (6.4 Mm) Crinkled Seam Binding Ribbon with the brush end of a Basic Black Dark Stampin' Blends pen.
In my video I show you lots of tips for partial image stamping as well as how to colour embellishments with a Dark Basic Black Stampin' Blend pen.
I hope you liked my little project and make your own little booklet to share with someone special!
I love the look of paper lanterns and when I saw the Power Of Hope stamp set, available for free during Sale-A-Bration, I immediately thought of making one. I looked at some paper lanterns I had left over from attending the Auckland Lantern Festival in previous years and attempted to copy them in miniature.
I used a piece of petal pink vellum 5" x 4" (12.7 cm x 10 cm) for the little lantern and stamped the images in Memento back ink all around it between two 1/2" (1.25cm) score lines. After the ink dried I cut 1/4" (0.5 cm) slices between the top and bottom score lines to create the curved lantern effect. I then glued the lantern sides together, overlapping one of the 1/4" (0.5 cm) slices. I used a couple strips of petal pink cardstock 1/2" x 5" (1.25 cm x 12.7 cm) to give it stability on the top and the bottom. I hung a petal pink Best Dressed Tassel using gold thread at the bottom of the lantern. This also created a way to hold the battery-operated tealight. I also used a 1/4" x 6" (0.5 cm x 15.24 cm) piece of petal pink cardstock to create a handle at the top. Using three flowers from the Seasonal Layers Dies, I die cut the petal pink cardstock and vellum to decorate the little lantern, thus hiding my joins on the top and bottom strips.
I love the way this lantern came out and it was so easy to make. If you'd like to make one yourself, have a look at my video for instructions.
If you make a lantern I'd love to see it. Please post your pictures in the comments or on my Facebook page.
I've finally finished my Christmas projects but I can't seem to stop crafting! So now I've turned my thoughts to the new year by making cute easel cards with mini calendars attached. The easel card design is simple and can be used for lots of different projects but here I use it to keep my sticky notes handy as well as a way for me to check the date!
For this project I used the Sailing Home cling stamps with the matching Smooth Sailing dies. I chose my colours from the Come Sail Away DSP -- Whisper White, Night of Navy and Mossy Meadow. On the first card I used an anchor from the Sail Away Trinkets, attaching it with a bit of the Night Of Navy/Sahara Sand Baker's Twine. My video shows how to use the smallest silver brad from the Metallic Brads to attach the hands to the compass.
The base of the easel is made from a 30.5 x 10.5 cm (12" x 4") piece of cardstock scored at 15.25 cm and 7.6 cm (6" and 3"). Glue a 15.25 x 10.5 cm (6" x 4") piece of coloured cardstock to the bottom half of the front of the card and a 14.25 x 9.5 cm (5-3/4" x 3-3/4") piece to the inside of the card. Glue a 14.25 x 9.5 cm (5-3/4" x 3-3/4") piece of designer series paper to the coloured front mat.
Glue the mini calendar to a piece of coloured cardstock which is slightly larger than the calendar, in my case that was a 7.6 x 5 cm (3" x 2") piece. You should be able to purchase the mini calendars online from a store in your country, however they need to be bought several months before the end of the year. Alternatively, you could print out your own and staple the months together. Glue the mini calendar to the dsp on the front of the card towards the bottom.
Stamp a piece of Whisper White cardstock with images from the Sailing Home stamp set and cut them out using the Smooth Sailing dies or the 3.8cm (1-1/2") Circle Punch depending on the images you stamp. You can also cut out images from coloured cardstock with the dies, such as the hands of the compass, the ship's wheel or the rope.
You can see exactly how to make one of these cards on my video here.
I taught this card at one of my Parent & Child classes recently, but we made it with the Good Morning Magnolia Bundle (Good Morning Magnolia Cling Stamp Set and the Magnolia Memory Dies). Some participants chose to stamp the image while others created a 3-D magnolia using the dies.
This would be a perfect gift for someone or make it for your desk so you have some note paper handy and will always know the date!
OnStage was so much fun! I love seeing my fellow demonstrators and all the products which will be coming out in the new year. It's such a great way to get excited about what's to come, especially when I currently have tunnel vision making lots of cards and gifts for orders and upcoming Christmas markets.
Paperartsie Team at Auckland OnStage
Besides getting my hands on the new Occasions and Sale-A-Bration catalogues, I love to get some new products. However I think my favourite thing about attending OnStage is getting to swap papercraft gifts with other demonstrators. It's such an exciting thing to do at the beginning of the event and is a great way to mingle with everyone there.
Freebies from OnStage November 2019
I know I can (and do) go online to get inspiration and ideas from around the world. You just have to look at my Pinterest page for the proof. But I like to get samples which I can refer back to whenever I want, which is why I love swaps! Plus it makes me feel so special knowing that someone made that little gift or card to trade with me! Here are pictures of the swaps I received this year and I have made a video showing them in more detail with the names of those who made each, if there was one included with the swap.
If you'd like more information about any of these please message me and I'll give you the details attached to the swap. Some demonstrators have included instructions or product details with their swaps and others have just included their names so you can look it up at their website.
If you'd like to enjoy the thrill of OnStage then you should join Stampin' Up! You'll get a great discount on your starter kit as well as an ongoing discount on any of your future orders. Contact me or your demonstrator for more information and maybe you'll be swapping with me at next year's OnStage!
I came up with an idea to make a card showing a snowman whose head has fallen off. Why has it fallen off ? I don't know. Maybe it was starting to melt. Maybe there was a gust of wind that blew it off. Maybe the snowman was in a snowball fight and got hit in the head. Maybe whoever was making the snowman went away and never finished putting the head on the body. No matter what story you create, it seems a bit sad to see the snowman reaching for it's fallen head. Since this didn't seem to be a Christmas card (even though there is a snowman), I decided to make it into an 'empathy' card.
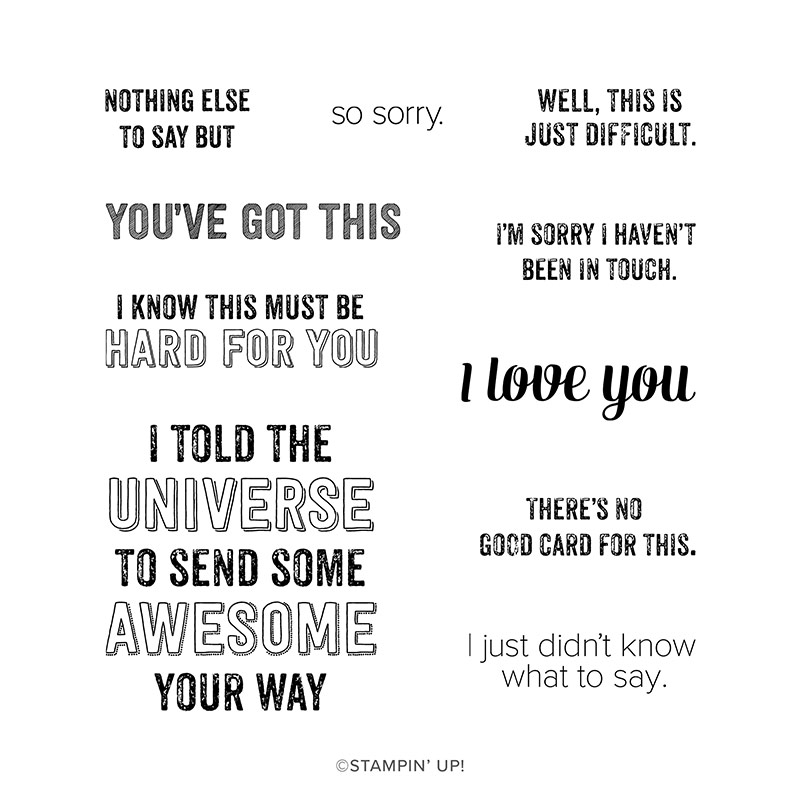
The inside of the card on the left says "I know this must be hard for you" and
the inside of the card on the right says "I just didn't know what to say."
Genuine Gems Cling Stamp Set
The Genuine Gems stamps were perfect for the sentiments because this stamp set has lots of sayings for those times you just can't find the appropriate words. This card would be perfect to give to someone to let them know you are thinking of them during a difficult time in their life.
The base of the card is a standard Whisper White A6 size (5-13/16 x 4-1/8"). I used two Balmy Blue pieces cut to 14.3 x 10 cm (5-5/8 x 4") for the background on the front and a mat on the inside. I cut one piece of Whisper White cardstock to 13.8 x 9.5 cm (5-7/16 x 3-3/4") for the inside of the card. I used two 2 x 10 cm (2-3/4 x 4") thin Whisper White pieces for the snowdrifts on the front of the card. I cut three circles using the smallest Layering Circles dies out of Whisper White cardstock to make the snowman.
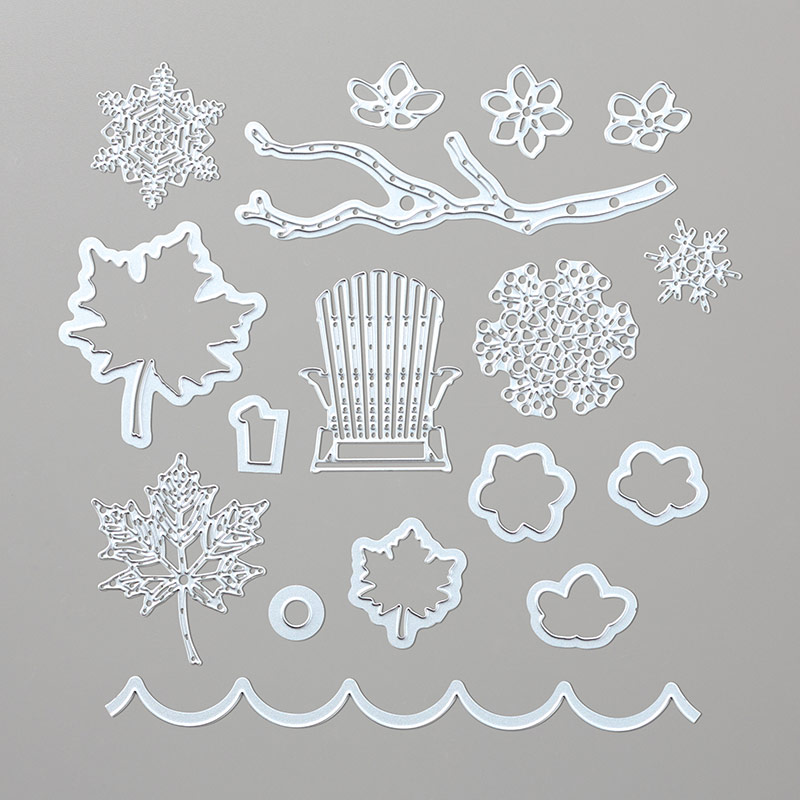
Seasonal Layers Dies
I stuck the snowman pieces to the card with Tombow Multipurpose Liquid Glue and Stampin' Dimensionals, tucking parts into the snowdrifts. I cut a scrap of Basic Black cardstock into a hat shape and glued a little strip of Old Olive cardstock on it as a hat band before placing it on the card with dimensionals. I cut a long triangle from a scrap of Pumpkin Pie cardstock and drew little lines on it with a Basic Black Stampin' Write pen to make the carrot nose. The two arms are cut out of Early Espresso cardstock using just the top part of the branch die from the Seasonal Layers die set. All pieces were glued into place using Tombow.
I made a video with instructions -- actually two videos because my phone stopped recording just before I had finished the card. In the first video I show you how to get the snowstorm effect by splattering Snowfall Accents Puff Paint on the Balmy Blue background before heating it with a Heat Tool. I also demonstrate how to tear the thin Whisper White cardstock for the bottom of the card. These pieces are layered to make a snowdrift effect for the snowman to be stuck in. To make the eyes and buttons I used Stampin' Blends to colour Basic Pearls and Rhinestone Jewels. I then had the difficult task of choosing which words to stamp on the front and inside of the card with Memento Tuxedo Black ink. There are so many good choices from the Genuine Gems stamp set!
If you live in New Zealand you can order all the products you need to make this cute snowman card at my shop or from your demonstrator.