Showing posts with label handmade card. Show all posts

Thursday, 7 May 2020

'Thinking of you' cards made with Covid-19 Giveback images

Stampin' Up! has created a Covid-19 Giveback PDF with some great sentiments and images relevant to the world's current situation. You can purchase this PDF file online for $12 USD and then you can print and use the them as many times as you'd like.


All the money raised from the sale of this downloadable file goes to two charities which are helping with the current pandemic: The World Health Organization’s COVID-Solidarity Response Fund and United Way Worldwide’s COVID-19 Community Response and Recovery Fund.

Some of the Covid-19 Giveback Sentiments
I printed some of the images from the PDF and cut them out using dies, punches and my paper snips.


Originally I planned on using the Double Wonder technique to make a few simple cards which I would just place the sentiments on top of . . . but I got a bit carried away and made 44 cards! 


I hope you like what I've made and I apologise for the bad photography -- the sunshine wouldn't cooperate with me!


You can see close ups of these cards in my YouTube video.


In my video I also show you all the sentiments and images you will get when you purchase the Covid-19 Giveback PDF.


I rarely throw anything out so I have a large stash of bits and pieces from old projects which I used to make cheerful cards to #ShareSunshine with strangers.


I am going to drop them in to mailboxes on my walk down the hill here in Tuakau.


A few of the backgrounds are from very old 'attempts' at cards using embossing folders and inks.


Some of the embellishments and embossing folders are no longer available but they worked well with the images I printed.

The 'Quaran-tini' cards are for my family in the USA!
I hope I have given you inspiration to make some cards to share sunshine with people in your neighbourhood and to help raise funds for two excellent charities.


#KeepCalmAndCraft #ComputerAndCraftDesigns #StampinUp #creativetherapy #StayHome #Punches #Covid19 

Monday, 4 May 2020

Many different features and uses of Stampin' Up! punches

Stampin' Up! punches are well made and heavy compared to other companies but that is only one of the many features of these fabulous products. There is so much to say about these punches that I have made three short videos to explain everything and I have included them throughout this blog post.

My Stampin' Up! Punches Stacked
All the punches have a locking mechanism which allows them to be locked in the closed position for easy transportation and storage. You simply slide the dark grey lock towards the punch hole to unlock, which allows it to open up for use. To lock the punch, just hold it closed and slide the grey plastic towards the front of the punch. This keeps it flat so you can store the punch stacked on a shelf or in a drawer.

The shapes and sizes of some punches -- the two on the far left are unlocked and the rest are locked and stacked.
The image on the top of each punch shows the actual size of the item that will be created when you use the punch. The front, angled edge of the punch has a small picture of the image as well, so you can easily find the punch when they are stacked.


When I first get a new punch I use it on some cardstock so I can test how it works. I am then left with a template which is very useful when designing my projects.

Punch templates are handy when designing a project as you can use them to choose the correct size for your sentiments.
I can place the template over my cardstock to see how the image will fit my project. I can also use the templates to determine which size label punch will fit the sentiments I want to use.

Some cards and papercraft projects with the punches I used to make them.
The templates are also very useful when using a punch that has more than one image. Place the stamps on top of the cutout sections of the template (the negative space) to arrange them so they will perfectly fit in the punch after you have stamped the cardstock.


I show you how to do this with the Hot Air Balloon punch in this video.


Stampin' Up! punches are strong and durable but sometimes they do get dull with a lot of use. You can sharpen them easily by punching some aluminium as shown in my next video.


You can use the image you have leftover after sharpening to make some interesting projects. Here I have made some flowers with the daisy and leaf punches. I just attached the metal images to some green wire and gently shaped the flowers with a bone folder and my fingers.

Some little metal flowers and leaves made from aluminium cans, wire and buttons.
I hope you've learnt some things about using punches from this post and my videos. Punches are great tools for enhancing your cards and to complement your projects!

#KeepCalmAndCraft #ComputerAndCraftDesigns #StampinUp #creativetherapy #StayHome #Punches

Thursday, 9 April 2020

Brighten someone's day with a rainbow card!

I decided to make several cards to leave in my neighbours' letterboxes to bring a bit of cheer to them during New Zealand's countrywide lockdown. I copied an embossing technique I saw online from a fellow demonstrator in the USA, Connie Tumm.


It's a quick and easy card to make as long as you have six different embossing folders. If you don't have that many folders, or none at all, you can create the card without embossing the coloured cardstock or maybe just emboss a few pieces.

I used cardstock from the five 2018-2020 In Colors plus Gorgeous Grape to make a my 6-colour rainbow cards. I know there are 7 colours in a rainbow (red, orange, yellow, green, blue, indigo and violet) but I didn't have enough room on my cards and I think it looks just as good without a second blue colour.


For the base of the cards I used Whisper White Note Cards & Envelopes which are 5" x 3-1/2" (12.7 x 8.9 cm) and I cut a Basic Black cardstock mat to 4-1/2" x 3" (11.5 x 7.5 cm). I also used 4" x 2-3/4" (10 x 7 cm) coloured cardstock -- Lovely Lipstick, Grapefruit Grove, Pineapple Punch, Call Me Clover, Blueberry Bushel, and Gorgeous Grape.


After embossing each coloured cardstock with a different 3-D Embossing folder (Brick & Mortar, Tin Tile, Hammered Metal, Country Floral, Scripty, Button Button) I cut each piece into 5/8" (1.5 cm) strips which gave me enough to make 6 cards.


I decorated the front of each card with a different sentiment in Memento Tuxedo Black Ink using the Stitched So Sweetly dies except for two cards which I fussy cut. Some of the cards were embellished with epoxy shapes or jewels to add a bit of sparkle to them. I even stamped the back of each envelope using my Stamparatus for accurate placement.

Back of envelope stamped with 'Stamping Your Way to the Top' stamp set
Instead of signing the cards and sealing the envelopes, I made up a poem to put inside so that the recipient could share the card with someone else.
This little card was made for you 

to brighten up your day.

If it made you smile then its job is done 

and you should send it on its way.

Please give it to someone you know 

to pass along the cheer.

Since all of us need to know 

there is always someone there! 
Have a look at my video for more details on how to make your own rainbow cards and for lots of tips on using embossing folders.


Brightening someone's day by giving them a handmade card is very satisfying, even if you don't see the recipient's face when they open the envelope.

Thursday, 2 April 2020

Make lots of quick cards with a Memory & More card pack

If you need to make lots of cards quickly then you should use a Memories & More card pack! These packs come with 50 double-sided cards, stickers and other elements which are sized perfectly for making cards or doing scrapbook pages.

With two different sized cards in the packs (4" x 6" and 3" x 4") you will be spoilt for choice when it comes to putting a project together. These sizes are made to match perfectly with any of the card and envelope packs available from Stampin' Up! Plus with the included stickers you can make lots of cards without even stamping!

I used a few cards from the Magnolia Lane Memories & More card pack to make three different cards. I started by cutting three of the 3" x 4" cards into strips and then placed them on card fronts in slightly different arrangements.

The first card I made has the strips spaced slightly apart on a Magnolia Lane large card with a couple stickers and some silver thread to finish off the front.

For the inside I simply layered one of the printed vellum sheets over a large 4" x 6" sentiment card.

For my second card I glued the strips on a piece of 3" x 4" whisper white cardstock before embossing the piece using the Subtle embossing folder. This gave some texture to the design. I then used some more stickers to decorate the front including a sentiment.

My final card was created on a whisper white Notecard and I placed the strips with a small gap between each piece. I used more stickers from the Memories & More pack to decorate the front of this little card.

Have a look at my video to see how I cut the cardstock and for some tips on using the Memories & More card packs.
I hope you enjoyed these samples of ways you can quickly create cards.

#KeepCalmAndCraft #ComputerAndCraftDesigns #StampinUp #creativetherapy #StayHome #MemoriesAndMore #Scrapbook #Notecard #KeepCalmAndCraft #CraftHappy 

Friday, 8 November 2019

Snowman 'Empathy' Card

I came up with an idea to make a card showing a snowman whose head has fallen off. Why has it fallen off ? I don't know. Maybe it was starting to melt. Maybe there was a gust of wind that blew it off. Maybe the snowman was in a snowball fight and got hit in the head. Maybe whoever was making the snowman went away and never finished putting the head on the body. No matter what story you create, it seems a bit sad to see the snowman reaching for it's fallen head. Since this didn't seem to be a Christmas card (even though there is a snowman), I decided to make it into an 'empathy' card.
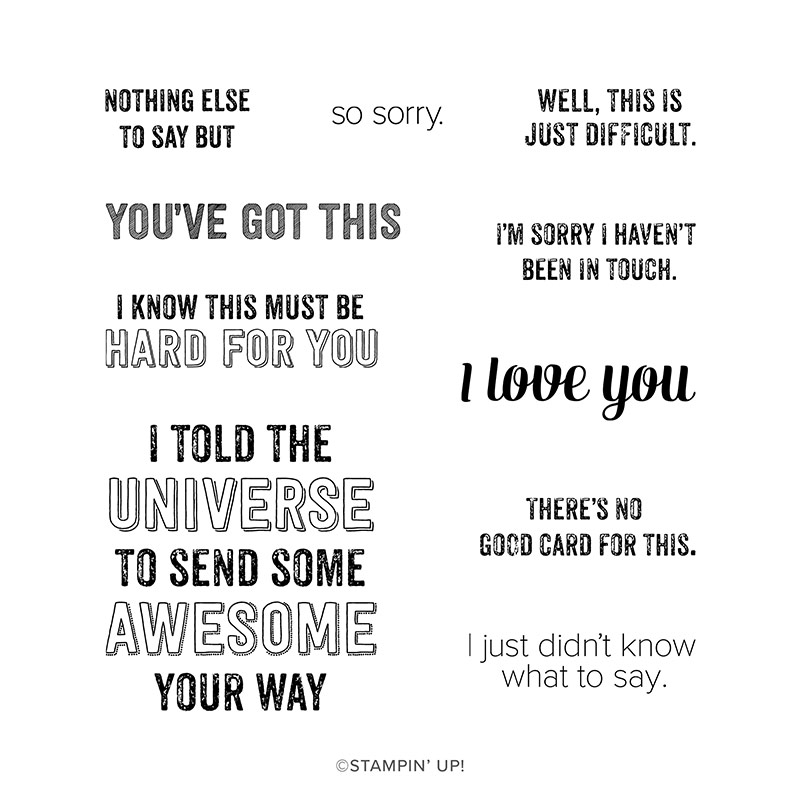
The inside of the card on the left says "I know this must be hard for you" and the inside of the card on the right says "I just didn't know what to say."

Genuine Gems Cling Stamp Set
The Genuine Gems stamps were perfect for the sentiments because this stamp set has lots of sayings for those times you just can't find the appropriate words. This card would be perfect to give to someone to let them know you are thinking of them during a difficult time in their life.
The base of the card is a standard Whisper White A6 size (5-13/16 x 4-1/8"). I used two Balmy Blue pieces cut to 14.3 x 10 cm (5-5/8 x 4") for the background on the front and a mat on the inside. I cut one piece of Whisper White cardstock to 13.8 x 9.5 cm (5-7/16 x 3-3/4") for the inside of the card. I used two 2 x 10 cm (2-3/4 x 4") thin Whisper White pieces for the snowdrifts on the front of the card. I cut three circles using the smallest Layering Circles dies out of Whisper White cardstock to make the snowman.

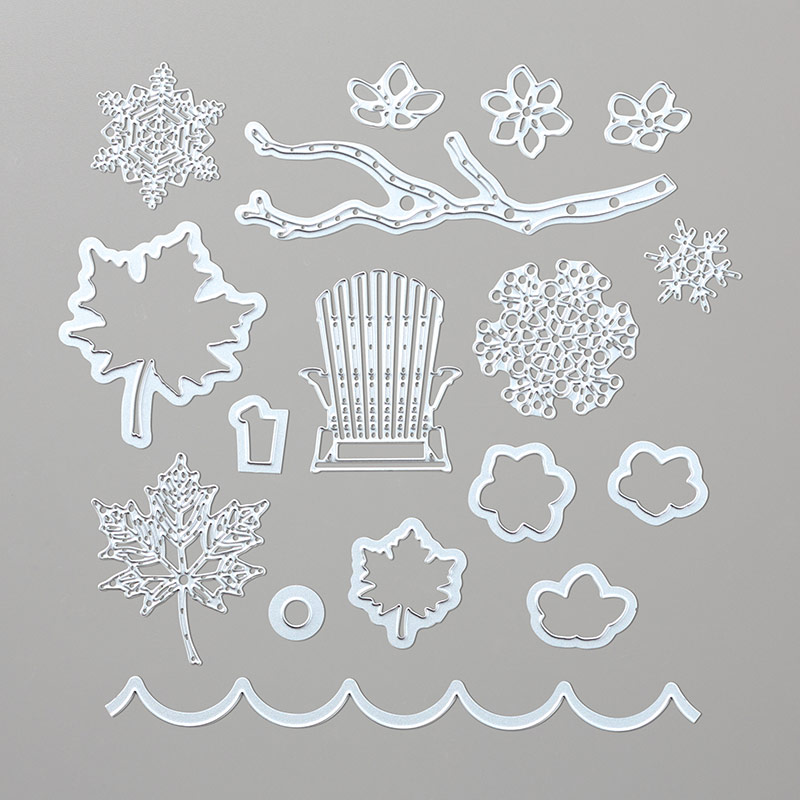
SEASONAL LAYERS DIES
Seasonal Layers Dies
I stuck the snowman pieces to the card with Tombow Multipurpose Liquid Glue and Stampin' Dimensionals, tucking parts into the snowdrifts. I cut a scrap of Basic Black cardstock into a hat shape and glued a little strip of Old Olive cardstock on it as a hat band before placing it on the card with dimensionals. I cut a long triangle from a scrap of Pumpkin Pie cardstock and drew little lines on it with a Basic Black Stampin' Write pen to make the carrot nose. The two arms are cut out of Early Espresso cardstock using just the top part of the branch die from the Seasonal Layers die set. All pieces were glued into place using Tombow.

I made a video with instructions -- actually two videos because my phone stopped recording just before I had finished the card. In the first video I show you how to get the snowstorm effect by splattering Snowfall Accents Puff Paint on the Balmy Blue background before heating it with a Heat Tool. I also demonstrate how to tear the thin Whisper White cardstock for the bottom of the card. These pieces are layered to make a snowdrift effect for the snowman to be stuck in. To make the eyes and buttons I used Stampin' Blends to colour Basic Pearls and Rhinestone Jewels. I then had the difficult task of choosing which words to stamp on the front and inside of the card with Memento Tuxedo Black ink. There are so many good choices from the Genuine Gems stamp set!


If you live in New Zealand you can order all the products you need to make this cute snowman card at my shop or from your demonstrator.

#KeepCalmAndCraft #ComputerAndCraftDesigns #StampinUp #creativetherapy #StayHome #PaperCraftIdeas #ChristmasCard #HandmadeCard #SnowmanCard #Empathy