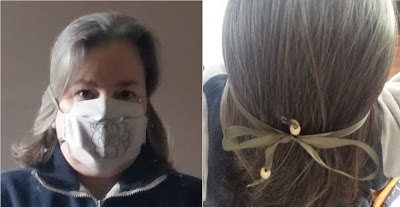
I looked online to learn how to make homemade face masks and once I found a design I liked, which I could easily make with materials I have here at home, I got started on sewing the masks. However, being a creative person I had to decorate them as well!
I started with a 5" x 9" (12.5 cm x 22.5 cm) rectangle piece of material which was not porous and had a flat surface so I could stamp on it. I marked 2" (5 cm) in from each corner and connected the marks with a diagonal line which I then cut off as shown in my video.
I folded down each long side 1.5" (3.8 cm) and ironed it in place, making a crease. I then folded over each short end twice to make a sleeve for the ribbon and sewed it in place. Next I folded back the long sides and placed a few small stitches on an angle to make a pleat which created a 3-D effect. You could even colour the image in with permanent pen like Stampin' Blends to make it prettier.
To finish up I pulled the ribbon through each sleeve, leaving a loop on the bottom of the face mask. After placing a bead on the ends of the ribbon I was able to secure them with a double knot. To wear the face mask, place the loop over your head and around the back of your neck. Tie the ribbon into a bow on the top of your head to hold the mask in place.
I hope you are able to follow my instructions and will make your own face mask to stay safe and healthy. Don't forget to decorate it with your favourite rubber stamp!
#KeepCalmAndCraft #ComputerAndCraftDesigns #StampinUp #creativetherapy #StayHome #Punches #Covid19 #FaceMask


No comments:
Post a Comment